Newsbrewerie
A Modern Newspaper Theme App
- created: 15/08/2022
- latest update: 15/08/2022
- by: Elated Themes
- https://appbrewerie.com/
Newsbrewerie - A Modern Newspaper Theme App
1. Getting Started
Welcome to the Newsbrewerie User Guide. The User Guide covers all the information needed to build your own Newspaper theme app with Newsbrewerie, from installing the prerequisites to building and publishing your app to improve your reach of your company. If you need any further assistance regarding Newsbrewerie App, do not be hesitated to reach out to us by sending an email to at support@appbrewerie.com and our support team will be glad to help you out.
You can navigate through different sections of the User Guide by clicking on the links in the menu to the left of your screen. You will also notice that we have highlighted certain parts of the text throughout the User Guide, such as important pieces of information, useful tips, and helpful code snippets, with different formatting for an easier overview. Here are some examples of the different formatting we use for Useful Tips, and Code Snippets:
<div class="code-snippet">This is a helpful code snippet</div>
In this first section of the Newsbrewerie User Guide we will go through the essential steps required before starting to customize or build the Newsbrewerie App. After that, we will discuss the customizations of Newsbrewerie App, while also guiding you on building and deploying your app. At the end of this section you will also find a set of Frequently Asked Questions related to this section.
Newsbrewerie App File Structure
Before moving forward, let us have a brief understanding of the file structure. After installing the .zip file from CodeCanyon, extract the content into a directory of your choice.
Inside of the zip file should include the following content:
- android
- assets
- ios
- lib
- resource
- web
- analysis_options.yaml
- pubspec.lock
- pubspec.yaml
- README.md
- Assets: This folder contains images, fonts, and icon of your company. More about it in the Customization section.
- Inside lib, config.dart: The lib/config.dart file is the configuration file that allows you to modify the configurations of the app. More about it in the Customization section.
Installing Flutter
The first required for Newsbrewerie is to have your system installed with Flutter SDK. According to your operating system, these are their specific installation methods:
- Flutter in Windows installation: Click here to continue.
- Flutter in MacOS installation: Click here to continue.
- Flutter in Linux installation: Click here to continue.
Once the installation and setup is complete, head to Flutter Test Drive Guide, follow the guide to test drive in order to make sure that Flutter is successfully setup on your machine.
Install an IDE
In order for easy editting and syntax highlighting, it is recommended to isntall an IDE before going forward (Although, this is not required, but it is highly recommended).
Here are some recommended IDEs
-
Visual Studio Code is highly recommended for its fast performance and plugins.
It is compatible with Windows, Linux, and MacOS:
Click here to install Visual Studio Code. -
Xcode is only available for MacOS users, especially to build iOS apps.
Click here to install Xcode.
Build Newsbrewerie App
Before continue to configure your app, let us build the Newsbrewerie App with default configurations first.
- First, open Newsbrewerie app folder in your preferred IDE (We will use Visual Studio Code as demonstration)
-
Open your Android emulator.
Remark: We assume that you have already setup Android environment, and an Android emulator, as guided in the Install Flutter section. -
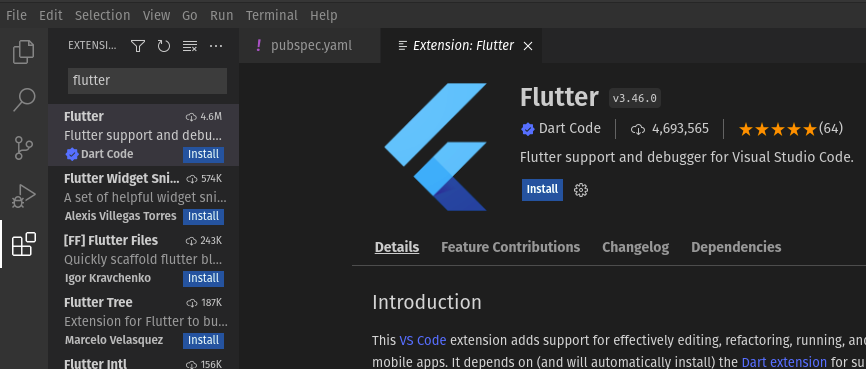
On the sidebar, click on Extension, search for Flutter, then install the Flutter Extension Bundle.
-
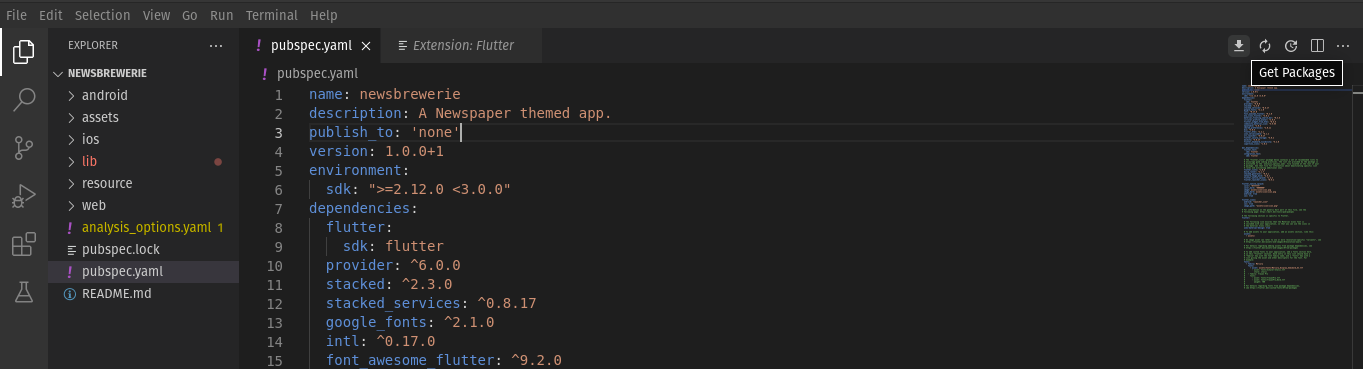
Head to pubspec.yaml file, and click on the download icon, to update the packages.
-
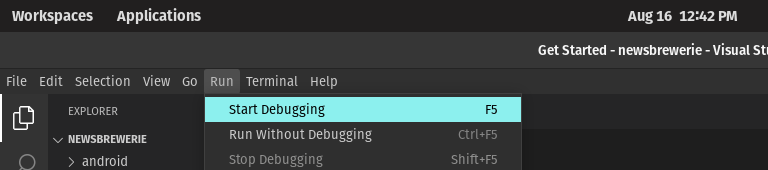
Head to lib/config.dart, on the menu bar, click on Start Debugging.
 You should be able to see our Newsbrewerie App built and launched on your emulator.
Move on to the next section, to configure and bind your app with your wordpress website.
Troubleshooting FAQ
1. Why can't I build the app
Before building the app, make sure that you have gone through all the previous steps:
After going through the steps, if you still cannot build the app successfully, please contact our support at support@appbrewerie.com for assistance. We would love to help.2. Why is my website content not displayed on the app?
In Build Newsbrewerie App section, we had built the app on default configurations. Means that the app had yet to bind with your website. Continue to the next section where we will start configuring our app.
If you have other questions and concern, please contact us by sending an email to support@appbrewerie.com
2. Configuring Newsbrewerie App
In this section of the User Guide, We will guide you on how to bind your Wordpress website
to the your app, making sure the content is synced. Follow the steps below and
at the end of this section, you should have your Wordpress website synced with your app.
At the end of this section you will also
find a set of Frequently Asked Questions related to this section.
Install Wordpress Plugins
To make sure the app works and behave as expected, you will need to install several Wordpress plugins that will do the job for you.
Here are the lists of plugins you have to install into your Wordpress website:
-
JWT Auth Plugin: this plugin will be handling the authentication part of the app for you.
You may install the plugin here. -
Simple Local Avatars Plugin: this plugin will sync the profile picture of your website users to the
app.
You may install the plugin here.
Install Newsbrewerie Wordpress Plugin
To make sure your app is synced with the content of your Wordpress website, you will need to install several Wordpress plugins.
To achieve that, you will have to install Newsbrewerie Wordpress Plugin:
- From the project folder, head to resource/ folder.
- Inside, you will see there is a .zip file with the name of NewsBrewerieAPI.zip
- Now, head to your Wordpress website admin panel / dashboard.
- On the sidebar, click on Plugins, then click on Add New

- Next, click on Upload Plugin, then click on Browse to find and select NewsBrewerieAPI.zip mentioned previously.
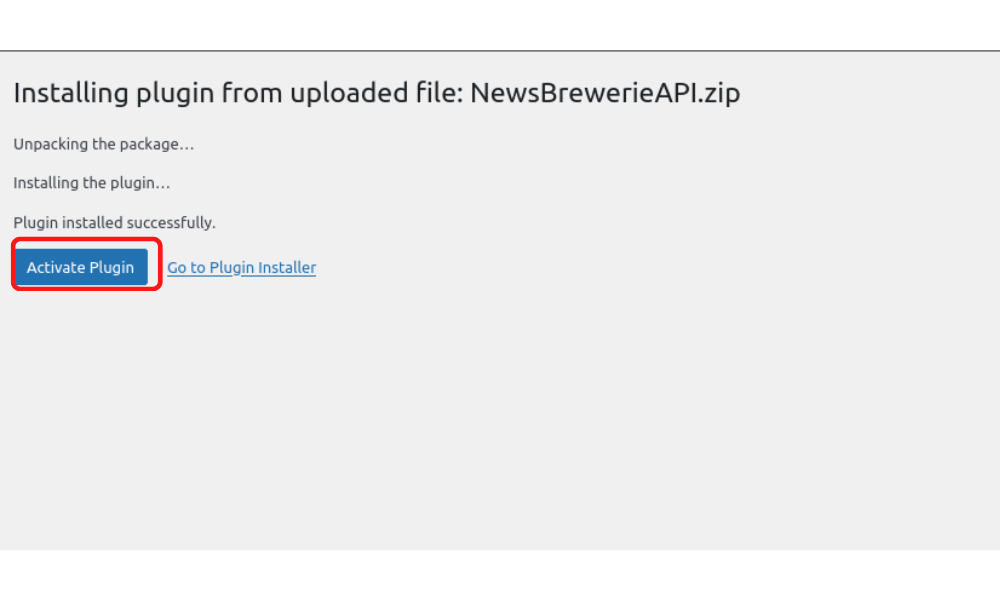
- Once the .zip file is uploaded successfully, click on Install Now

- Lastly, once it is installed successfully, click on Activate to activate the
plugin.
Configure Base URL
Last but not least, this step is also required to allow the Newsbrewerie App to sync with your Wordpress website content as well as authentication.
To achieve that:
- Head to lib / config.dart
- Locate api_baseUrl, after the equal symbol (=) & inside the single quotes, replace the url with the url of your Wordpress website
- Remember to save the file
3. Customizing Newsbrewerie App
In this section of the User Guide, we will discuss the customization of the app in detail. We will discuss how to easily customize the app according to your company by just editting a file. As mentioned, We made it easy for our users to configure the app by keeping all configurations in one file, which is located at lib / config.dart
Change Name of the App
One of the most important configuration of all is changing the name of the app, from Newsbrewerie to Your Company!!
To achieve that:
- Head to lib / config.dart
- Locate appName, after the equal symbol (=) & inside the single quotes, replace Newsbrewerie with your company name
- Remember to save the file
Change the Logo of the App
To change the logo of the App, follow the following steps:
- First, make sure your logo file is in PNG or JPG image format.
- Move the logo file into assets/images/
- Head to lib / config.dart
- Locate appLogo, after the equal symbol (=) & inside the single quotes, replace the image file path with the file path of your logo
- Remember to save the file
Change the Font Family of the App
To change the font of the App, follow the below guide:
- Head to lib / fonts.dart. Inside you will see the top 10 most used fonts, as shown below:
- Head to lib / config.dart
- Locate appFont, after the equal symbol (=) & inside the single
quotes,
replace the font with the font of your choice.

- Remember to save the file
Change the Splash Screen
A splash screen is the screen that is displayed whne users open the app. You can easily change the configuration of the splash screen with the following steps:
- First, make sure your image file to be displayed on splash screen is in PNG or JPG image format.
- Move the logo file into assets/icon/
- Head to lib / config.dart
- Locate appIcon, after the equal symbol (=) & inside the single quotes, replace the image file path with the file path of your image file
- Remember to save the file
- Head to lib / pubspec.yaml
- Locate flutter_native_splash
- Under flutter_native_splash are the configuration settings of the splash screen:
-
color: the background color of the splash screen.
Edit the HEX values to change the color.
Head to Color Picker , to pick the color of your choice, copy the HEX values, and replace the existing values. - color_dark: the background color of the splash screen in dark
mode.
Edit the HEX values to change the color.
Head to Color Picker , to pick the color of your choice, copy the HEX values, and replace the existing values. -
image: remember the appIcon, you editted in above,
this configuration means that your image file in above, will be
displayed
on the splash screen.
Make sure that you have the same image path as appIcon
- image_dark: same as image but it is displayed if the app is running in dark mode.